Choose the colors for your party based on a central object that will be in the room. Since Stella was going to be the center of attention for the party, I based the colors of her party on her tutu.
 | ||||
| Digital card created using Photoshop and My Digital Studio from Stampin' Up! |
Tips to keeping it thrifty:
1. Use your home or a room that you can get for free. In our case, we reserved a room at the church where I work. I even was able to borrow the white table linens for free. I just have to wash them before I return them.
2. Keep the menu to snacks and light refreshments. Cut up your own veggies, fruit and cheese cubes. Prepackaged trays are always way more expensive. I wanted to make little star sandwiches, but again...time was not on my side (because I procrastinate!) So if you really want to go all out with your star party, you could make turkey and cheese sandwiches or peanut butter and jelly (whatever you wish) and cut them out with a star cookie cutter.
 |
| Individual Photos by Mary Ann Slinn |
3. Make as many of the decorations as you can.
- I had some of my own vases and borrowed the rest from a friend. I used tissue paper I had saved from all of Stella's baby showers last year and turned them into pom-pom flowers, just like I did to make this star wreath. I put them in the vases to add some color. Even if you had to go out and buy tissue paper, you would only need to buy one pack of each color. Most packs of tissue paper come with 10 sheets, and one sheet would make at least 4-8 pom-pom flowers to fit in the vases.

- I actually didn't make these hanging decorations, because I ran out of time. For a pack of 3, it was only $7 at Party City. You could make these, but you would need to use a whole pack of tissue paper just for one and follow the same directions to make the mini pom-pom flowers, just bigger. All in all, I would have saved myself about $3, and I justified buying them because it would have taken me more time to make them than it was worth.

 |
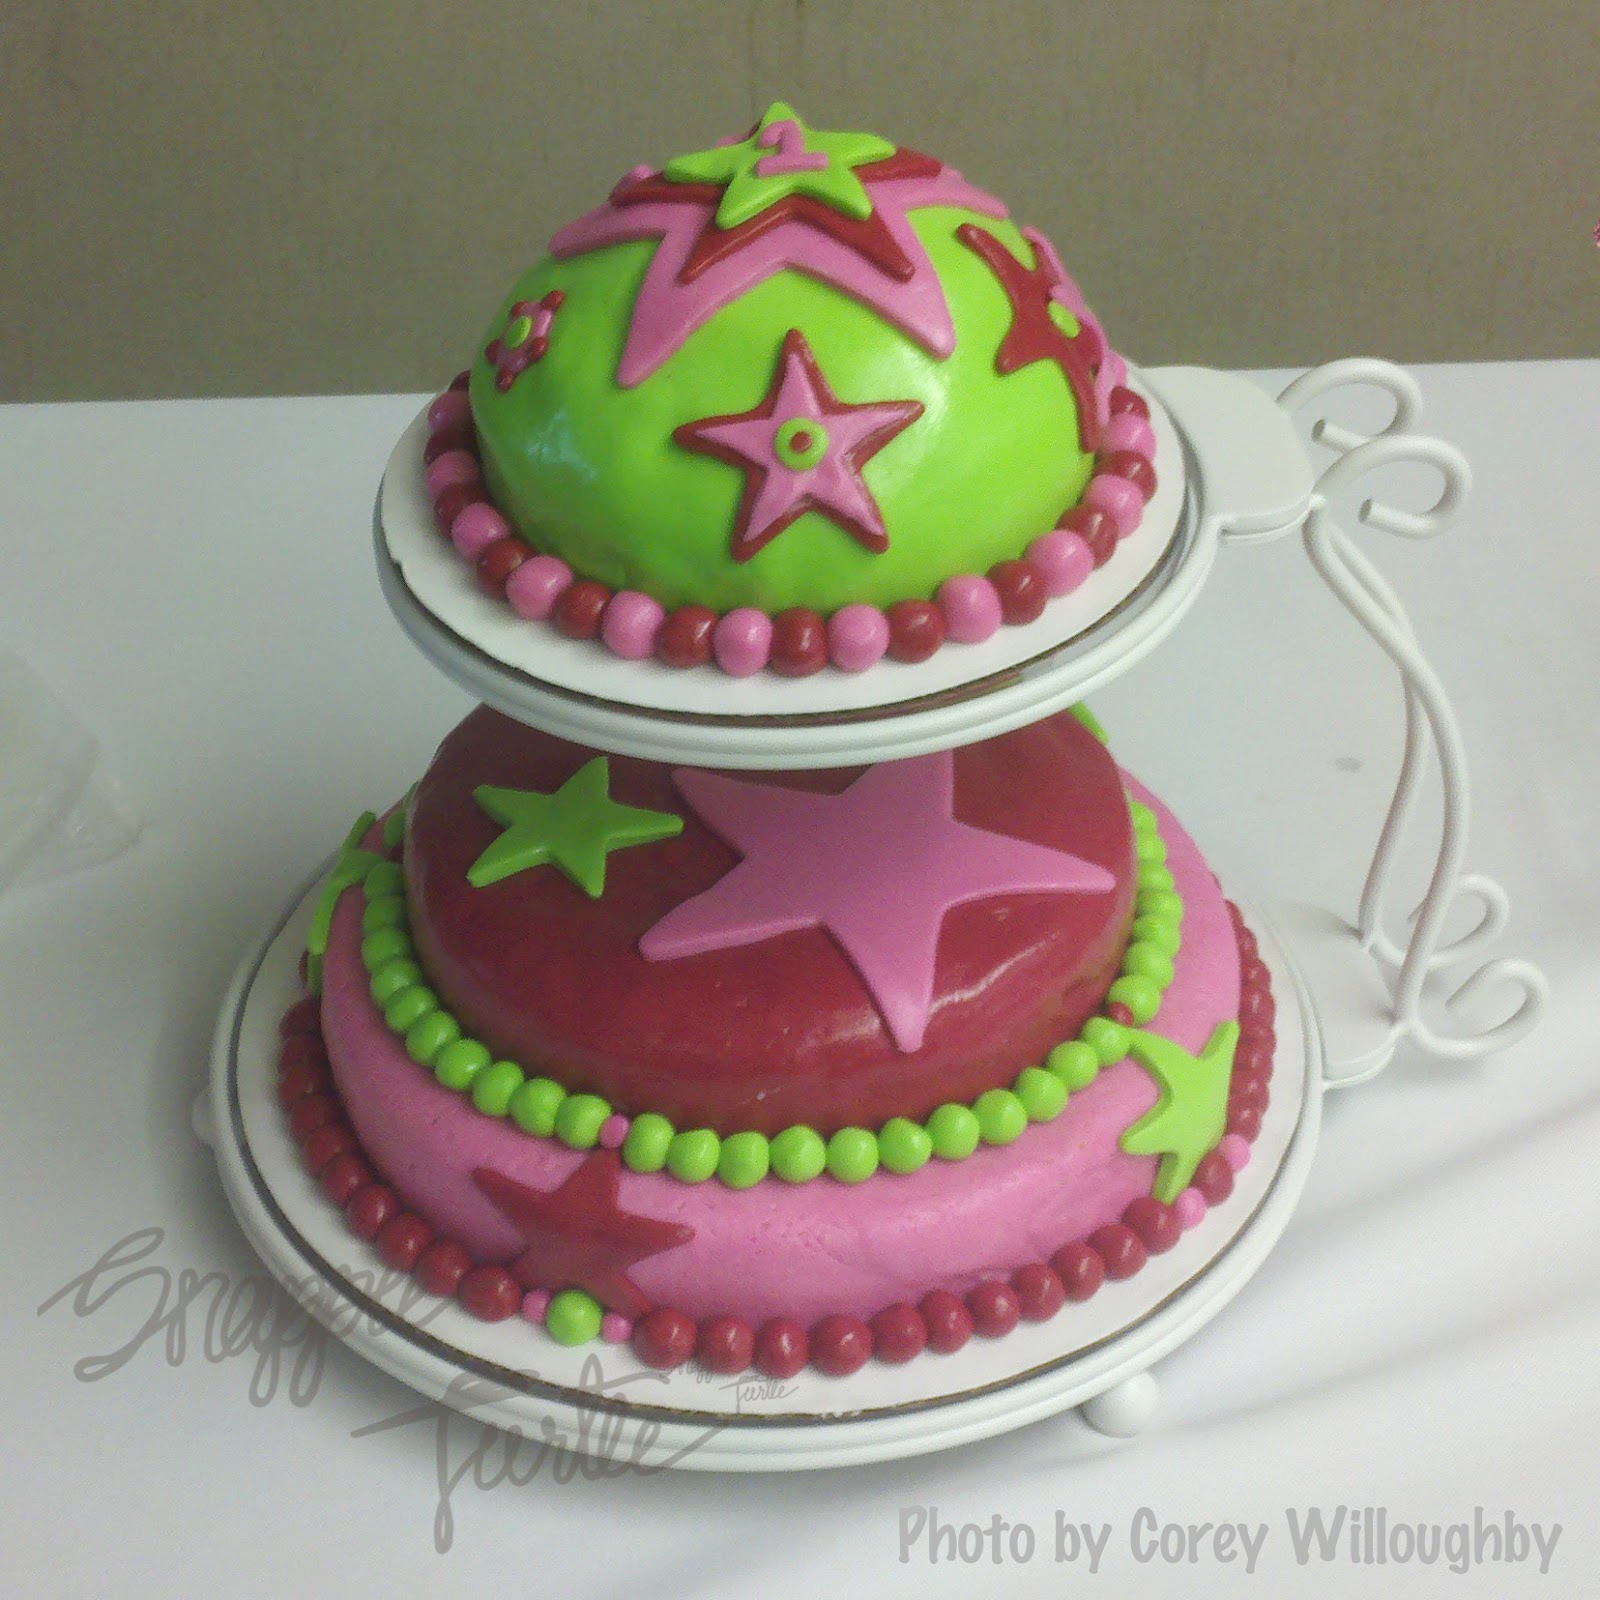
| Photo by Corey Willoughby |
- I had 6 round tables in the room. On each table there were 2 picture frames with a picture of Stella from one of the first 12 months of her life. The frames were bought at the Dollar Tree for a buck a piece. I ran out of time, but my plan was to make little table cards that stated which month the picture was from with a list of all her milestones she had met in that month
FOR THE CAKE TIERS
$2.50 for 2 boxes of Betty Crocker Confetti cake mix
$1.80 for a carton of eggs
$3.20 for vegetable oil
$7.50
FOR THE BUTTERCREAM ICING
$ 1.25 for 1 bag of Domino's powdered can sugar
$ 5.00 Wilton's meringue powder
$ 4.00 Wilton's butter flavoring
$ 3.30 Vanilla Extract
$13.55
FOR THE MARSHMALLOW FONDANT
$ 5.45 for Crisco shortening (I bought the larger tub for future use)
$ 2.50 for 2-10.5oz bags of Kraft Jet Puffed mini marshmallows
$ 5.25 for 4 each colors of Wilton's icing coloring
$ 2.50 for 2 bags of Domino's powdered cane sugar
$15.70
If you have absolutely none of the above ingredients, your TOTAL COST would be: $36.75
You could easily skip the fondant part and just color the butter cream icing, and your cake would only be $26.20 (you would still need to buy the food coloring, so I didn't subtract that amount).
Most of you will already have some of these items in your pantry, so you'll save even more than I did! At least for the next cake you make, you will have the vanilla extract, butter flavoring, Wilton's icing coloring, Crisco shortening and meringue powder. That in itself will save you $23 dollars!
For your next cake, it would only cost you $13.75 or $3.20 if you skip the fondant!! You can't buy a cake for that cheap!
 5. I purchased a pack of 10 sunglasses in an assortment of colors for $2.00 at WalMart to give to the other kids as favors. I got the sunglasses idea from my friend, Heather, who did the same thing for her son's first birthday. Half of pack of sunglasses were shaped as stars and the other half were hearts.
 |
| Photo by Corey Willoughby |
7. Oh, yea! Don't forget the matching plates, napkins and plastic ware! I also had matching buckets to keep the ice water, as seen in the very first picture.
Well, that's all I have for ya! Stars are so much fun, aren't they? I hope you enjoyed our star themed party!
Party on,
Eva :)
Linking up with: